by Sam Tackeff | Jan 2, 2010 | Baking
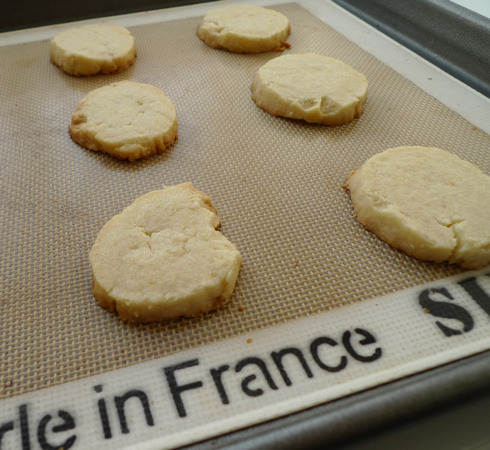
I haven’t been baking lately. Martha, my poor Kitchen Aid mixer has been a little bit lonely as my healthy lifestyle goals have reduced the amount of cookies coming out of my oven. I generally tend to use the excuse that my stove is unreliable, but the truth is, I’m afraid of baking a batch of wonderful cookies and not being able to control myself from eating the entire batch. Ah, the woes of a food lover trying to find balance.
Fortunately, I was invited to a party – which means that a host gift was in order – and Martha was finally put to good use for a batch of shortbread, one of my favorite cookies. I used to consume those stick shortbread in the red plaid packaging on a regular basis (Walkers), but baking your own buttery, crumbly shortbread is one of the easiest forays into baking there is, and well worth the (limited!) effort.
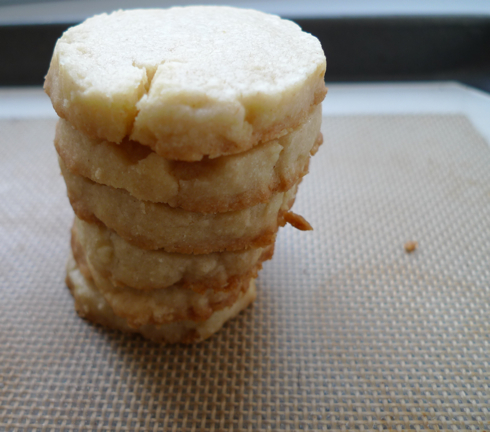
Traditional shortbread is made from one part white sugar, two parts butter and three parts oatmeal flour, but all I had on hand was some white flour, which tends to be the most commonly used today. Fortunately, If you stick to the ratio of 3 parts flour: 2 parts fat: 1 part sugar, you can be pretty adventurous – perhaps substituting some rice flour, or cornflour to vary the texture without risking the integrity of the final product.
You can also add in a number of mix ins – mini chocolate chips, flavoring such as almond or vanilla extract, citrus zest of all kind, pecans, dried fruit, or even use fresh herbs such as lavender or rosemary.
Other wonderful aspects of the shortbread cookie: The dough can be made in advance, rolled into a log, and stored in your refrigerator for several days so that you can slice a few cookies off when you want them. They also ship fairly well and are great as gifts. And the greatest part is that there are no eggs in the batter so you can eat it raw with abandon.
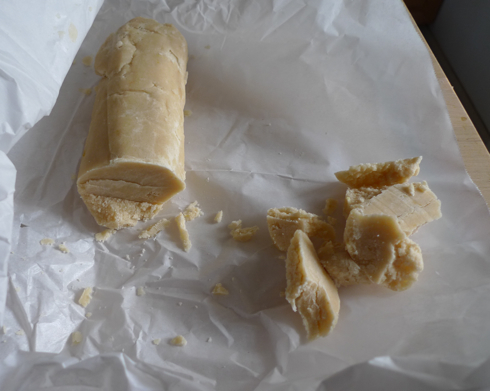
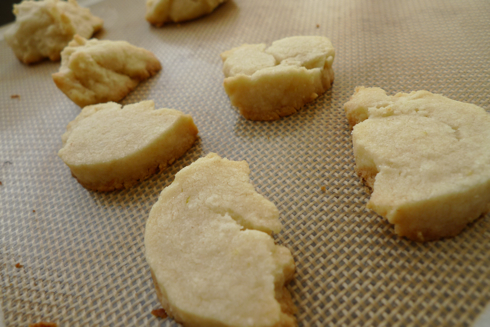
And don’t forget the cookie crumbles! You can bake those too! (The rejects make great quality control for the cook…) Now, to avoid broken slices, just let the log sit at room temperature for a few minutes before slicing, and use a warm knife. I’m impatient however, so some of my cookies turned out like this…
Shortbread
Makes about 2 dozen
1 1/2 cups all purpose flour
a pinch of kosher salt
2 sticks unsalted butter, softened
1/2 cup sugar
1 teaspoon vanilla extract
zest of 1/2 a lemon
1. In a bowl, mix flour and salt, and set aside.
2. In the bowl of a mixer, add softened butter and sugar, and beat on medium speed just until just smooth, about 2 minutes. Add vanilla extract, and lemon zest, and beat until combined. Set speed of mixer to low. Slowly add flour mixture to the mixer, and beat on a low speed until blended and just coming together.
3. Form dough into a logs, about 2 inches in diameter; wrap in parchment, and refrigerate 1 hour (or up to 3 days). If it’s still slightly crumbly, don’t worry, pack it tightly in the log, and it should firm up in the refrigerator. You can also freeze the dough for up to one month, and if frozen, let the log stand at room temperature for 10 minutes. 15 minutes before taking the dough out of the refrigerator, preheat the oven to 350 degrees Fahrenheit.
4. Remove shortbread from the fridge and remove parchment. Slice logs into 1/4-inch-thick rounds, and space about 1 inch apart on baking sheets lined with parchment or Sil-pat. Bake in the preheated oven until the edges are just slightly golden, about 12 minutes. Let cool to room temperature. (Cooling both allows the cookies to firm up so that they don’t fall apart, and will also help you to avoid burning your mouth on 350 degree butter.)
Cookies can be stored in an airtight container for up to 1 week, but believe me, they won’t last this long. They are also freezable, for up to a month.
Note: Recipe can easily be doubled, tripled, you name it. The main rule of thumb is to stick to the 3-2-1 ratio of flour to fat to sugar.
by Sam Tackeff | Dec 29, 2009 | Baking, Local stores
Before I forget, I wanted to put up a few photos that I took at Omnivore Books over the past few weeks. Working in this little bookstore is so enjoyable on a day to day basis, but what really makes it exciting are all the great events that we have. We have such a great little community!
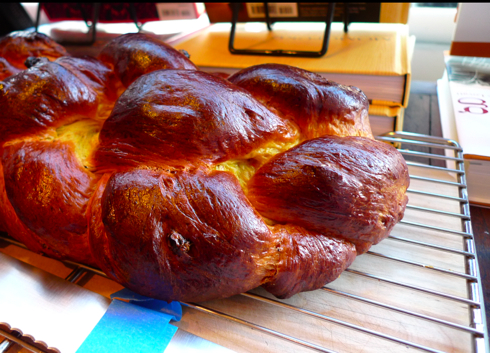
One of the best perks are the foods that our customers bring in for events to share with everyone. This braided spice bread called “Saffranbrod” was made by Robert, in honor of St. Lucia Day on December 13th. It was a dense yellow bread, filled with spices that let off incredible aromas. We topped it with lingonberry jam. And it was still warm. I ate three slices. The recipe was from our guest speaker Greg Patent’s cookbook ‘A Baker’s Odyssey‘ in honor of his arrival. The stars had aligned!
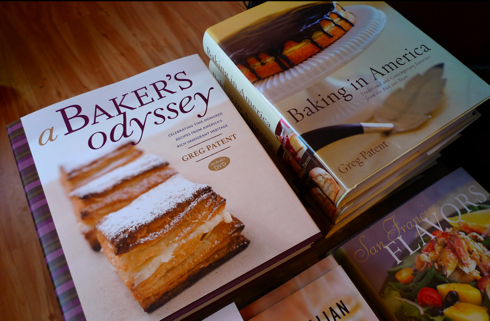
Greg Patent, who writes GREAT books about baking, including among others ‘A Baker’s Odyssey‘ and ‘Baking in America’ (which won a James Beard) couldn’t have been more enjoyable. He comes from a diverse food background: he was born in Shanghai, with one grandmother from Iraq cooking Middle Eastern foods, and the other grandmother from Russia. When he was 11 his parents moved back to the U.S., and along the way to these cookbooks he ended up getting a Ph.D in Zoology. What is it with scientists and food? There are so many crossovers!!! (Barbara Ghazarian, author of Simply Quince is a micro-biologist… and Harold McGee…)
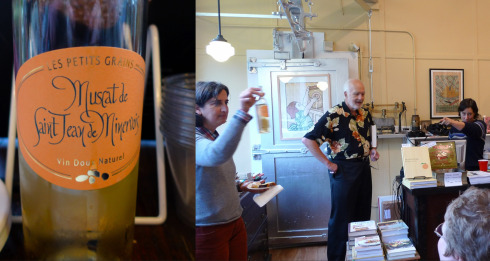
Here’s a picture of Greg with Celia, our fearless leader at Omnivore, and Paula, lifting up the bottle of Muscat that was sent to us to enjoy. It was a Les Petits Grains Muscat de Saint Jean de Minervois, a beautiful sweet wine that I sincerely wish I had a case full of!!! (I’m thinking of all the possibilities… most of which involve me drinking it straight… but maybe a sabayon? Ice cream? Ooo….)
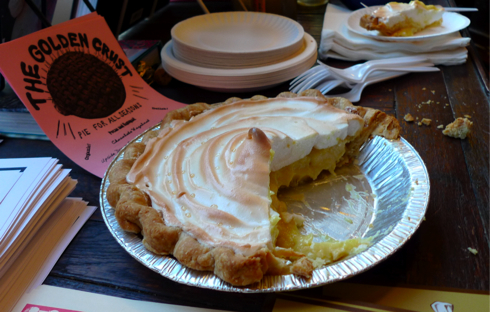
But wait! There was more! Seriously…. I could subsist completely on the food I eat at work…. One of our other customers Jessica has started a seriously tasty little pie business here in San Francisco called The Golden Crust, and brought us some wonderful lemon meringue to sample. So good!
I think I’m going to make this a regular feature.
Omnivore Books
3885 Cesar Chavez Street
San Francisco, CA 94131-2013
(415) 282-4712
Come visit us!
by Sam Tackeff | Jun 29, 2009 | Baking, Daring Bakers
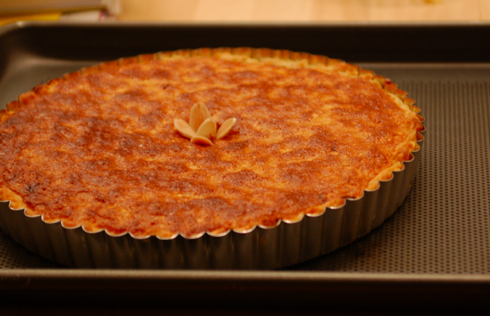
The June Daring Bakers’ challenge was hosted by Jasmine of Confessions of a Cardamom Addict and Annemarie of Ambrosia and Nectar. They chose a Traditional (UK) Bakewell Tart… er… pudding that was inspired by a rich baking history dating back to the 1800’s in England.
This is the perfect tart to serve as a thin slice in the afternoon with tea, or for dessert, or, even well… for breakfast. The basic recipe is a shortcrust, thinly spread with any lovely jam or curd that you have on hand, topped with frangipane – an almond, butter and egg concoction. I used strawberry jam, out of a jar. Next time I’m making my own, I promise.
Bakewell Tart…er…pudding
Makes one 23cm (9” tart)
sweet shortcrust pastry + one cup jam or curd, warmed for spreadability + frangipane
Sweet shortcrust pastry
225g (8oz) all purpose flour
30g (1oz) sugar
2.5ml (½ tsp) salt
110g (4oz) unsalted butter, cold (frozen is better)
2 (2) egg yolks
2.5ml (½ tsp) almond extract (optional)
15-30ml (1-2 Tbsp) cold water
Sift together flour, sugar and salt. Grate butter into the flour mixture, using the large hole-side of a box grater. Using your finger tips only, and working very quickly, rub the fat into the flour until the mixture resembles bread crumbs. Set aside. Lightly beat the egg yolks with the almond extract (if using) and quickly mix into the flour mixture. Keep mixing while dribbling in the water, only adding enough to form a cohesive and slightly sticky dough. Form the dough into a disc, wrap in cling and refrigerate for at least 30 minutes.
Frangipane
125g (4.5oz) unsalted butter, softened
125g (4.5oz) icing sugar
3 (3) eggs
2.5ml (½ tsp) almond extract
125g (4.5oz) ground almonds
30g (1oz) all purpose flour
Cream butter and sugar together for about a minute or until the mixture is primrose in colour and very fluffy. Scrape down the side of the bowl and add the eggs, one at a time, beating well after each addition. The batter may appear to curdle. In the words of Douglas Adams: Don’t panic. Really. It’ll be fine. After all three are in, pour in the almond extract and mix for about another 30 seconds and scrape down the sides again. With the beaters on, spoon in the ground nuts and the flour. Mix well. The mixture will be soft, keep its slightly curdled look (mostly from the almonds) and retain its pallid yellow colour.
Assembling the tart
Place the chilled dough disc on a lightly floured surface. If it’s overly cold, you will need to let it become acclimatised for about 15 minutes before you roll it out. Flour the rolling pin and roll the pastry to 5mm (1/4”) thickness, by rolling in one direction only (start from the centre and roll away from you), and turning the disc a quarter turn after each roll. When the pastry is to the desired size and thickness, transfer it to the tart pan, press in and trim the excess dough. Patch any holes, fissures or tears with trimmed bits. Chill in the freezer for 15 minutes.
Preheat oven to 200C/400F.
Remove shell from freezer, spread as even a layer as you can of jam onto the pastry base. Top with frangipane, spreading to cover the entire surface of the tart. Smooth the top and pop into the oven for 30 minutes. Five minutes before the tart is done, the top will be poofy and brownish. Remove from oven and strew flaked almonds on top and return to the heat for the last five minutes of baking.
The finished tart will have a golden crust and the frangipane will be tanned, poofy and a bit spongy-looking. Remove from the oven and cool on the counter. Serve warm, with crème fraîche, whipped cream or custard sauce if you wish. When you slice into the tart, the almond paste will be firm, but slightly squidgy and the crust should be crisp but not tough.
by Sam Tackeff | Jun 12, 2009 | Baking, Books, Cookware, Pantry Staples
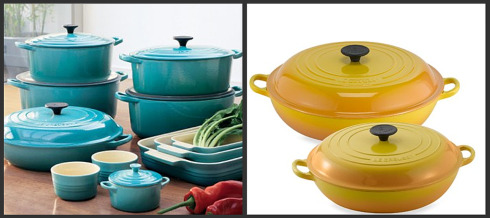
Dear world, I’d like a Le Creuset French Oven (medium or large), and a braiser. Any color will due, although, extra points are given for ‘Carribean’, ‘Cobalt’, or ‘Onyx’. Perhaps you have an extra lying around, or your dear great aunt in San Francisco has a stockpile of them in her kitchen and can’t really lift them anymore because they weigh a ton. Perhaps you are reading this from the Le Creuset or the Sur La Table corporate office, and think to yourself, today, this very lucky young lady in Noe Valley will have a package shipped to her. If you are any of these people, don’t hesitate to contact me. I can barter, trade, and provide you with tasty sustenance in return. Your generosity will be greatly, greatly appreciated.
* * * * *
One difficult thing about moving across the country in a couple of suitcases – taking your kitchen with you.
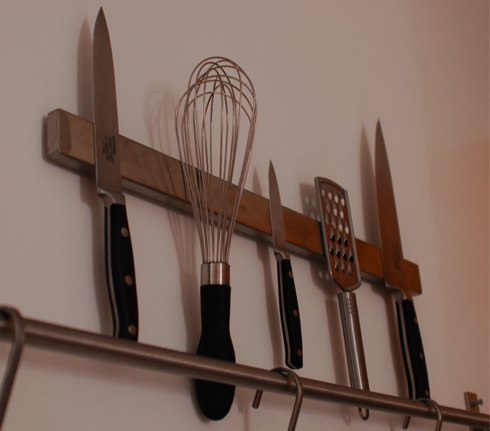
The easiest to bring are the little tools, which can be boxed and arrive in no time flat: like David Lebovitz, I’m a big fan of my scissors, and I love my tongs, my Kyocera ceramic knife I picked up at Zabars, and my knife set, and my little stovetop espresso maker, my graters, my Moulinex, my Silpat, my whisk, my measuring cups, wooden spoons, silicone spatula, williams and sonoma kitchen towels, and silicone pinch pots. Along with these came my collection of bento making supplies: boxes, rice presses, tiny fish shaped soy sauce holders, mini utensils, silicone muffin cups, and box bands.
My expansive spice collection was also shipped, and I have since supplemented with a collection of spices and spice rack from Martha Stewart which was on sale at Macy’s for under twenty dollars. I couldn’t live without my spice mixes from Penzey’s, my Super Special Spice Mix from my grandmother in Istanbul, my assortment of curry powders, garam masala, five spice powders, mace, turmeric, corriander, and excess of cumin.
Fortunately, I am blessed to be living with someone who was given a very, very nice set of calphalon pots – so I didn’t have to shlep my slightly shoddy pieced together collection of pots and pans with me. He also came with a lovely red tea pot which, I’m glad to say gets significant amount of daily use.
He also gave me the very best present on earth for my birthday, a Martha Stewart Blue Kitchen Aid mixer, and in the next few months I will be saving for attachments… I think he deserves to be rewarded with the results of the Ice Cream maker attachment, and after several attempts of homemade pasta made with a rolling pin, I’m looking forward to the pasta attachment.
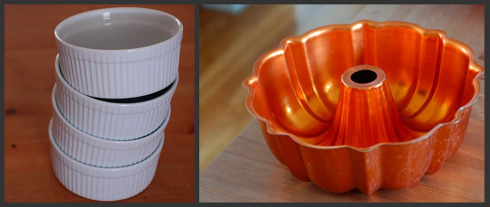
Bakeware is also a pain in the neck to ship, but fortunately for me, I live close enough to the Recycled Cookware store on Divisadero that I managed to pick up things like bundt pans, baking sheets, and loaf pans, and even a gently used coffee grinder for a few dollars a piece. My mother this weekend was a very kind soul to donate two Madeleine pans from her cupboards to my “cause”, because after six months of searching for “affordable” Madeleine pans, I had determined it a failed quest.
I’ve been a fan of Cook’s Boulevard, which, being right in the neighborhood, is useful, when, say, I’m in desperate need of ceramic bakeware for my herb baked eggs, or last minute meat thermometers, silicone popsicle makers, or, really great three dollar peelers.
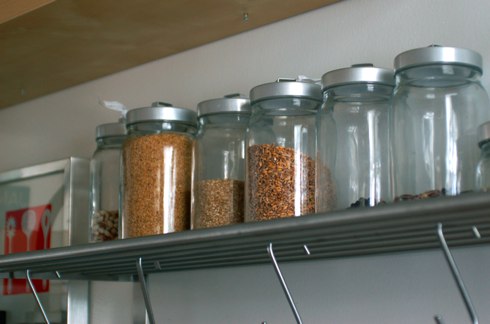
Ikea has been a savior for a new mortar and pestle, a digital kitchen scale, and glass jars in which I keep all of my bulk supplies – dried beans (currently I have Christmas Limas, flageolet, yellow indian woman, and popping corn, all from Rancho Gordo) rices (jasmine, arborio, sticky, and plenty of brown), whole grains (wheatberries, farro, bulgur), nuts (almonds, walnuts), chocolate chips, flours (white, wheat, cake, wheat bread flour, wheat bran, corn meal), and sugars (white and dark brown).
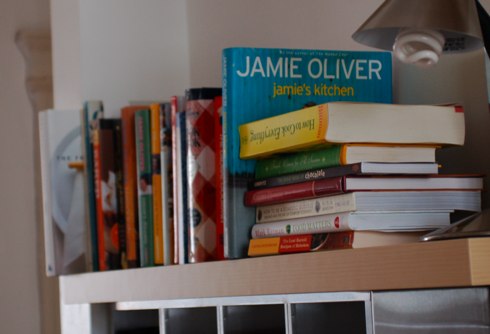
And of course, rounding everything out is my collection of cookbooks – most every Jamie Oliver tome, and an ever growing collection of signed books from the weekly talks at Omnivore Books on Food, the only cook book and food book store in San Francisco, and currently my favorite bookstore in the world.
by Sam Tackeff | May 27, 2009 | Baking, Cheese, Daring Bakers, Turkish
The technical details: The May Daring Bakers’ challenge was hosted by Linda of make life sweeter! and Courtney of Coco Cooks. They chose Apple Strudel from the recipe book Kaffeehaus: Exquisite Desserts from the Classic Cafés of Vienna, Budapest and Prague by Rick Rodgers. And many thanks of course to Lisa of La Mia Cucina and Ivonne of Cream Puffs in Venice.
The assignment: Strudel dough, filling of our choice. I knew I didn’t want apple filling, because, well, it just feels wrong to be eating apples in May, even though I now live in California, and I suppose I could get a nice, ripe, seasonally grown local apple if I looked hard enough.
So what did I choose? The Sigara Borek – a Turkish favorite of my childhood.
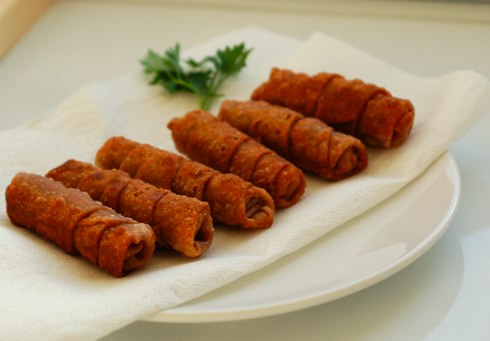
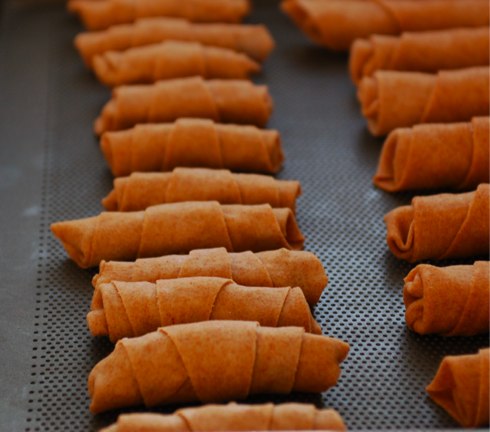
These things are crispy, fried, filled with white cheese and parsley, perfect for breakfast, an afternoon tea with guests, or to snack on while watching sports.
Mine are a bit of a bastardized version that ended up looking like dark fried wontons – because I had to use whole wheat bread flour instead of white, and then didn’t roll the stuff out as thin as I should have. The phyllo, or Yufka (Turkish phyllo) versions look a lot more golden. If you are going to make home made dough, it has to be done well in advance – the dough takes at least 90 minutes to sit.
The best part is that they can be made in advance, and then frozen – so you can pop them out and fry them in a little oil whenever you need them fresh.
But what if I’m looking after my health? Well, I also, in the spirit of Daring Bakers, tried a baked version, and another version which involves baking in water. Were they good you ask? As you can tell, neither of them are posted. So, that’s the beauty of freezing these guys, you can make three at a time, and not feel terrible about eating them all.
Sigara Borek
(makes a whole bunch, easily freezable)
Ingredients:
– a package of phyllo dough (or the Streudel Dough recipe below if you are up for a challenge)
– about 3/4 lb of white cheese (I use Bulgarian feta, or Valbreso the closest equivalents here in the states)
– a cup or more of freshly chopped parsley
– a little bit of water, for sealing the rolls
– vegetable oil, for panfrying
Method:
This works best as an assembly line:
1. Prepare the dough, by laying a flat sheet and cutting it into triangles (or if, you are rolling your own dough, roll it into a round shape, and cut out triangles like pizza slices).
2. Prepare filling: super easy! just mix the cheese and your really big handful of parsley together.
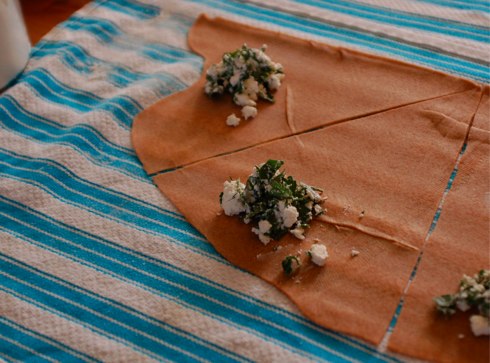
3. Spoon filling (about a heaping tablespoon) onto the wide end of the triangle (see my picture above), and then fold in the two sides, and roll up the end, using a little bit of water as glue to stick the end together. It’s easiest if you spoon the filling on a bunch of triangles and then roll them up one after another.
4. About here you can freeze the ones you aren’t going to be eating right away – freeze individually on a baking pan to keep them from sticking, and then once frozen, you can put them in a big ziplock together.
To eat: just fry for a few minutes in some vegetable oil, about a 1/4 inch deep on medium high heat, turning until all sides are golden brown (about 2-4 minutes). Note, if you use phyllo dough, they won’t have quite the bubble wonton look that mine do.
Home made dough:
from “Kaffeehaus – Exquisite Desserts from the Classic Cafés of Vienna, Budapest and Prague” by Rick Rodgers
1 1/3 cups (200 g) unbleached flour
1/8 teaspoon salt
7 tablespoons (105 ml) water, plus more if needed
2 tablespoons (30 ml) vegetable oil, plus additional for coating the dough
1/2 teaspoon cider vinegar
1. Combine the flour and salt in a stand-mixer fitted with the paddle attachment. Mix the water, oil and vinegar in a measuring cup. Add the water/oil mixture to the flour with the mixer on low speed. You will get a soft dough. Make sure it is not too dry, add a little more water if necessary. Take the dough out of the mixer. Change to the dough hook. Put the dough ball back in the mixer. Let the dough knead on medium until you get a soft dough ball with a somewhat rough surface.
2. Take the dough out of the mixer and continue kneading by hand on an unfloured work surface. Knead for about 2 minutes. Pick up the dough and throw it down hard onto your working surface occasionally. Shape the dough into a ball and transfer it to a plate. Oil the top of the dough ball lightly. Cover the ball tightly with plastic wrap. Allow to stand for 30-90 minutes (longer is better).
3. It would be best if you have a work area that you can walk around on all sides like a 36 inch (90 cm) round table or a work surface of 23 x 38 inches (60 x 100 cm). Cover your working area with table cloth, dust it with flour and rub it into the fabric. Put your dough ball in the middle and roll it out as much as you can. Pick the dough up by holding it by an edge. This way the weight of the dough and gravity can help stretching it as it hangs. Using the back of your hands to gently stretch and pull the dough. You can use your forearms to support it.
4. The dough will become too large to hold. Put it on your work surface. Leave the thicker edge of the dough to hang over the edge of the table. Place your hands underneath the dough and stretch and pull the dough thinner using the backs of your hands. Stretch and pull the dough until it’s about 2 feet (60 cm) wide and 3 feet (90 cm) long, it will be tissue-thin by this time. Cut away the thick dough around the edges with scissors. The dough is now ready to be filled.
by Sam Tackeff | Apr 27, 2009 | Baking
The April 2009 challenge is hosted by Jenny from Jenny Bakes. She has chosen Abbey’s Infamous Cheesecake as the challenge.
Well, silly me, I left this month’s Daring Bakers challenge to the very last minute. I was going to do it early, I swear! I bought the cream cheese a few weeks ago – and in honor of the challenge I got my birthday present from Devon early – a Martha Stewart Blue Kitchen Aid Mixer!!! Although really it’s a present for both of us, because I get to use it to make things like cheesecake, so he gets to reap the benefits.
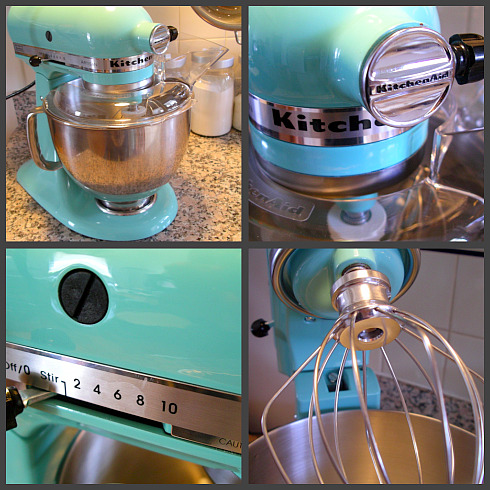
Isn’t she pretty? I’ve been thinking of naming her, and while “Martha” seems to be a little bit sacrilege, it fits her well.
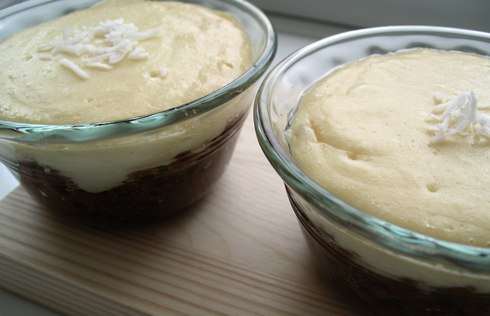
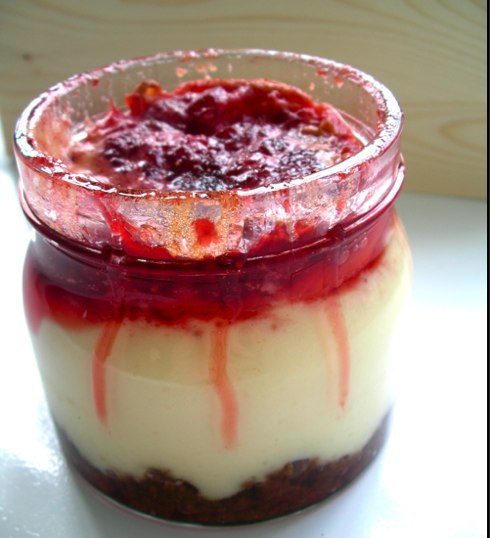
I made two variations here, the top one with Strawberries, left over from farmers market last week, and the other with lime and coconut, in honor of the song I’ve been singing away in my kitchen- You Put the Lime in the Coconut…. But seriously, whoever came up with that combination should get a sticker.
Here is the recipe, with my notes at the bottom:
Abbey’s Infamous Cheesecake
crust:
2 cups / 180 g graham cracker crumbs (I used Trader Joe’s cinnamon)
1 stick / 4 oz butter, melted
2 tablespoons / 24 g sugar
1 teaspoon vanilla extract
cheesecake:
3 sticks of cream cheese, 8 ounces each (total of 24 oz) at room temperature
1 cup / 210 g sugar
3 large eggs
1 cup / 8 ounces heavy cream
1 tablespoon lemon juice
1 tablespoon vanilla extract (or the innards of a vanilla bean)
1 tablespoon liqueur, optional, but choose what will work well with your cheesecake
DIRECTIONS:
1. Preheat oven to 350 degrees F (Gas Mark 4 = 180C = Moderate heat). Begin to boil a large pot of water for the water bath.
2. Mix together the crust ingredients and press into your preferred pan. You can press the crust just into the bottom, or up the sides of the pan too – baker’s choice. Set crust aside.
3. Combine cream cheese and sugar in the bowl of a stand-mixer (or in a large bowl if using a hand-mixer) and cream together until smooth. Add eggs, one at a time, fully incorporating each before adding the next. Make sure to scrape down the bowl in between each egg. Add heavy cream, vanilla, lemon juice, and alcohol and blend until smooth and creamy.
4. Pour batter into prepared crust and tap the pan on the counter a few times to bring all air bubbles to the surface. Place pan into a larger pan and pour boiling water into the larger pan until halfway up the side of the cheesecake pan. If cheesecake pan is not airtight, cover bottom securely with foil before adding water.
5. Bake 45 to 55 minutes, until it is almost done – this can be hard to judge, but you’re looking for the cake to hold together, but still have a lot of jiggle to it in the center. You don’t want it to be completely firm at this stage. Close the oven door, turn the heat off, and let rest in the cooling oven for one hour. This lets the cake finish cooking and cool down gently enough so that it won’t crack on the top. After one hour, remove cheesecake from oven and lift carefully out of water bath. Let it finish cooling on the counter, and then cover and put in the fridge to chill. Once fully chilled, it is ready to serve.
Pan note: The creator of this recipe used to use a springform pan, but no matter how well she wrapped the thing in tin foil, water would always seep in and make the crust soggy. Now she uses one of those 1-use foil “casserole” shaped pans from the grocery store. They’re 8 or 9 inches wide and really deep, and best of all, water-tight. When it comes time to serve, just cut the foil away.
Prep notes: While the actual making of this cheesecake is a minimal time commitment, it does need to bake for almost an hour, cool in the oven for an hour, and chill overnight before it is served. Please plan accordingly!
My variations:
Lime Coconut Cheesecake Cups: I substituted the juice of two limes for the lemon, and added two tablespoons coconut milk in a little more than half of the batter . (I was planning on mixing dry, unsweetened coconut in the crust, but then forgot*)
Strawberry cheesecake in a jar: In this one I put the graham crust on the bottom, spooned in the cheesecake in, and topped with a home made strawberry jam that I had started cooking at the beginning of prep: a pint of chopped strawberries with half a cup of sugar and a squeeze of lemon juice, reduced down for about 1/2 an hour on low heat.


