by Sam Tackeff | Mar 30, 2009 | Baking, Challenge, Daring Bakers, Italian, Pasta
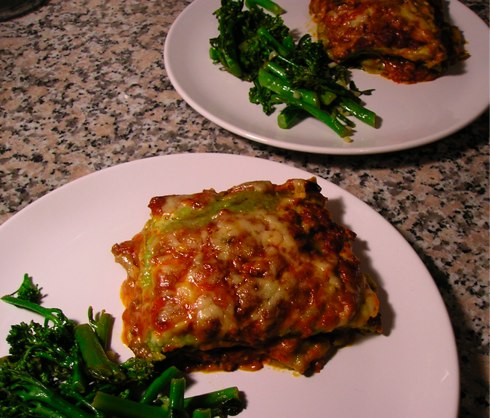
Daring Bakers. The March 2009 challenge is hosted by Mary of Beans and Caviar, Melinda of Melbourne Larder and Enza of Io Da Grande. They have chosen Lasagne of Emilia-Romagna from The Splendid Table by Lynne Rossetto Kasper as the challenge.
Every month, hundreds of bakers across the world band together in an effort to push their own culinary boundaries. Daring bakers is certainly not thirty minute meals. This month, we were making lasagna of Emilia-Romagna, a three part adventure which included home made spinach pasta, a home made ragu, and a creamy béchamel.
Ok, I thought. I’m going to make lasagna from scratch this month. Well I have another confession to make. I really, really, really enjoy Stouffers lasagna. Somehow, even after microwaving the stuff instead of baking it, it fulfills my every need and want. Somehow, this microwave boxed food is entwined with thoughts of Italian grandmothers slaving away in the kitchen, and remarkably the deception pulls itself off. Somehow, even though it pains me to say it, I love the stuff. So the idea of making a real lasagna, all from scratch… a challenge that would no doubt be fun to make, and delicious, was intriguing… but could it beat my trusty standby? You laugh, maybe you even scoff, but I was skeptical.
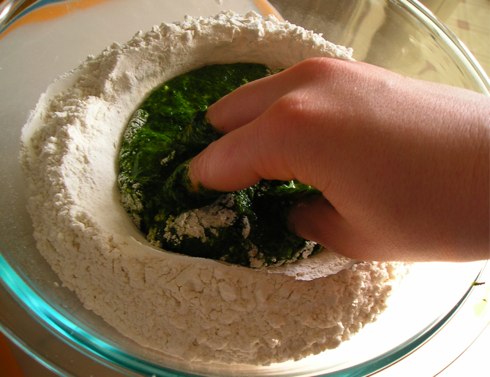
Challenge part #1: Homemade spinach pasta. Home made pasta is incredibly easy to make. You take just a few ingredients, usually just flour and egg, and mix, knead, roll, and voila- just a few minutes in a boiling pot of water, and done! The only difficult part: rolling out the dough. I’d highly prefer doing it with a Kitchen Aid mixer with the pasta attachment, but alas, all I have here is my own forearms, and a nice silpat rolling pin.
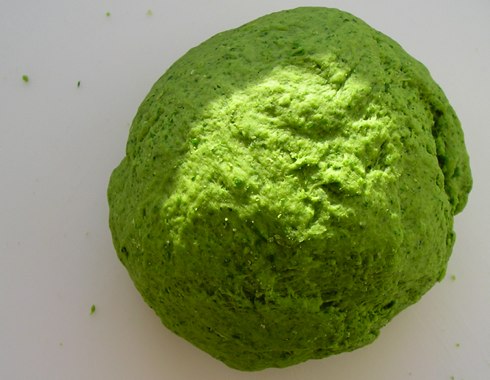 Another wonderful bonus of home made pasta is that the pasta dough is another good place in which to hide vegetables in for the picky eater. For this pasta, I used two eggs, 3.5 cups of flour, and I added spinach, about 6 ounces of defrosted frozen spinach, which I had emulsified with my hand held emulsifier. This makes the paste smooth, and easily workable into the dough. If I were to do this dish again, I’d probably add some basil as well, but you could easily puree any vegetable and add it to a basic dough.
Challenge part #2: A delicious ragu. For this part, I did a cheat move, using jarred pasta sauce as a base. I added meat, and cooked it for about an hour, so ultimately it doesn’t save any time, just imparts some fantastic flavor. Yes, part of it was jarred, but I don’t feel bad. The stuff is delicious.
“Cheats Ragu”
1/2 onion
an ounce of bacon
1/2 lb ground veal
1/4 cup of red wine
a jar of really good store bought tomato sauce
(I used Trader Joes Rustico- Southern Italian sauce), but I might easily have substituted barilla.
Saute the onion for about ten minutes, with some good olive oil. Add the bacon, and saute, add the half cup of wine, and cook for a minute, dump in the jar of pasta sauce. Cover really loosely (more of a stain catcher), and stir occasionally, cooking at a slow bubble for about 45 minutes or more.
Challenge part #3: A Bechamel (white sauce) This is the key to a rich, hearty lasagna. In a medium saucepan, melt 4 tablespoons of butter, and then sift in 4 tablespoons of flour, whisking it all until smooth. Slowly whisk in 2 2/3 cup of milk, whisking constantly to avoid lumps forming. Bring to a slow simmer, and stir until the sauce thickens, about seven or eight minutes. Season with salt, pepper, and most importantly some freshly grated nutmeg. The nutmeg imparts the most wonderful flavor that gives the whole lasagna something special.
Finally, with the three parts prepared, I put together the lasagna, layering the (boiled) pasta, sauces, and some freshly grated parmesan, and baked it all (covered loosely with foil) for 40 minutes at 350 degrees F.
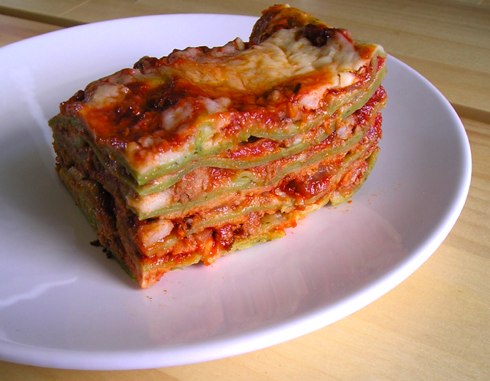 Ultimately, this lasagna was delicious. Painfully delicious. As in my forearms. All of the rolling. I spent three days eating it, hot, cold, microwaved, for breakfast, until I could lasagna no more. Was it better than my Stouffers? Er… Yes. Would I make it again? Yes. Although, probably sooner if I had a Martha Stewart Blue Kitchen Aid Mixer. (Hint, hint…. nudge, nudge…) Until then, I’ll savor this experience.
Aside: If anyone is interested in slaving away recreating this, I have the longer, much more detailed recipe for the pasta and assembly that I would be more than willing to email.
by Sam Tackeff | Mar 26, 2009 | Barefoot Blogging, Cheese, Food Travel
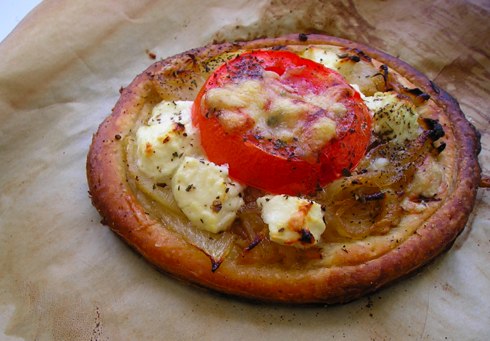 This weeks Barefoot Blogging challenge, chosen by the lovely Anne of Anne Strawberry is one of my favorite recipes of Ina’s, her absolutely delicious Tomato Goat Cheese Tarts. These tasty tarts have two types of cheese: goat, and another melty cheese (Ina uses parmesan, but I used fontina this time to fulfill Adventures in Gluttony’s Cheese of the Month Challenge) and so really, how can you go wrong? It’s also a fairly great base recipe for getting in your vegetables, as you could easily top on a variety of seasonal vegetables and it would work out fantastically.
In order to serve them justice, (and admittedly to get out of the city for some quiet), I decided to go on a quest for cheese outside of San Francisco. We hopped in the car in the early afternoon, and drove across the golden gate bridge, heading up the coast for the country. Cheese, an ocean view, sunshine, farm land, and cows are among my criteria for excellent adventuring, and all were successfully met on this trip.
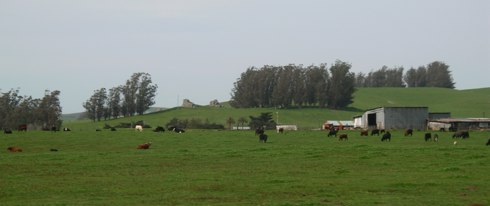 We drove up the 101 to Petaluma, and then across towards Tomales, a tiny town on the 1, where we stopped at Mostly Natives Nursery so I could buy some herbs for my kitchen including a rosemary bush, some cilantro, parsley, marjoram, oregano, two types of thyme, and mint. I’m used to having a garden with fresh herbs, and now living on the third floor with no land, I’ve been missing out. I’m hoping these guys will pull through living in the house by the windows! We wanted to go to Tomales Bakery, but it is only open Thursdays through Sunday, so we continued back down the incredibly beautiful coastline, driving past Tony’s, and Hog Island Oyster Company (two food destinations which I will get to some point soon!), and towards Point Reyes.
 Point Reyes, in addition to being in the middle of beautiful farm land, right on Tomales Bay, is home to Cowgirl Creamery, the main destination of my cheese quest. After sampling, sampling and more sampling, I settled on three cheeses. Fontina, to satisfy my Cheese of the Month, some more of an aged gruyere that I purchased a few weeks ago in Cowgirl’s Ferry Building store, and some really remarkable goat cheese, called Hoja Santa. Hoja Santa is made in Dallas by Paula Lambert of the Mozzarella Company, and is wrapped in the leaves of the Hoja Santa plant, which is supposed to impart the taste of sassafras to the cheese. After sampling it, I knew it was the one for Ina’s tarts.
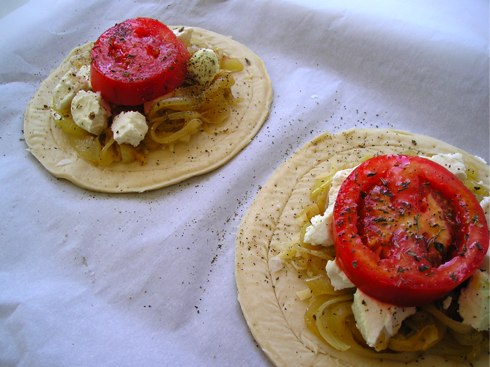 Today I made these tarts for lunch, and couldn’t have been a happier camper. So delicious!
Tomato and Goat Cheese Tarts
adapted from Ina Garten
Serves 2
Ingredients:
– 1 sheet of puff pastry, defrosted
– extra virgin olive oil
– 1/2 large onion, thinly sliced
– 1 clove garlic
– coarse salt and black pepper
– 2 tablespoons dry white wine
– 2 teaspoons minced fresh thyme leaves
– 4 tablespoons freshly grated Fontina, with some shaved
– 2 ounces goat cheese (I used plain, but Ina recommends herb and garlic Montrachet)
– 2 thick slices of tomato (about 1/4 inch) from a medium tomato
– a few teaspoons of julienned basil (use fresh if at all possible, but it works fine with dried)
Method:
1. Preheat the oven to 425 degrees.
2. Take a sheet of defrosted puff pastry (I used Trader Joe’s Artisanal Puff Pastry, frozen, which comes in big sheets), and draw six inch large circles of pastry, using a bowl or saucer as your guide. Place pastry rounds on a sheet pan lined with parchment, and stick in the fridge to keep them cold until you are ready to use them. (Note: quickly take the leftover scraps, sprinkle them with cinnamon and sugar, and put them in the oven for the next ten minutes or so while you cook the onions. They make a fantastic snack.)
3. In a pan on medium heat, add a couple of good glugs of olive oil, and saute the onion and garlic for about 15 minutes until starting to get very soft. Season with salt and pepper, add the white wine and thyme leaves. Turn the heat down just slightly, and cook for another 10 to 15 minutes until very soft and lightly browned. Take off the heat.
4. Now for the fun part: take your pastry rounds, and with a sharp knife, score a 1/4 inch wide border around the inside of the edge of the circle. Sprinkle about a tablespoon of the fontina cheese on each round, staying inside the scored border. (This is so when baking, the border will rise and create a little edge.)
5. In each circle, place half of your sauteed onions inside the border, and crumble an ounce of the goat cheese. Take your tomato and plop it on top, brushing it with a little bit of olive oil, giving it a sprinkle of salt, pepper, and the basil, and the rest of the fontina cheese.
6. Bake for 20 minutes, until the pastry is golden. You might want to watch it in the end, because if your oven is too hot or uneven it might start to burn. You can serve it on its own, or with a little lemony salad with arugula, and any leftover tomato you might have.
by Sam Tackeff | Mar 26, 2009 | Mexican, Restaurants, Seafood
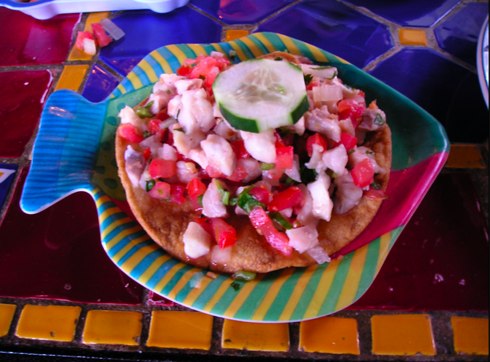
On our way back from our day trip up the coast, we stopped for a quick bite at Salsalito Taco Shop, in Sausalito, CA. I had a craving to fulfill, a baja style fish taco (fried fish, topped here with slaw), which somewhat tragically I missed out on even though I was actually in Mexico last weekend. I’m sure this doesn’t come close to Tacos El Fenix (in Ensenada, Mexico), but it was pretty tasty. 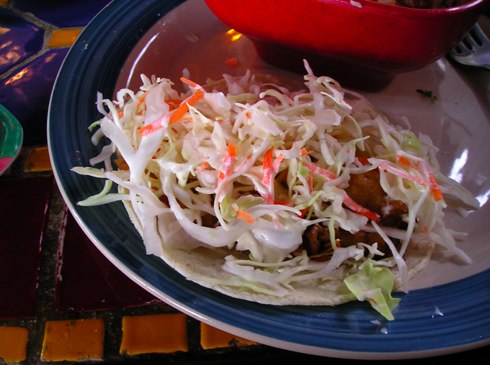 I also had some fish Ceviche, which was marinated really nicely in lime, and had a decent kick. It was also served on a fish shaped plate, so bonus points, in my opinion.
by Sam Tackeff | Mar 18, 2009 | Salads
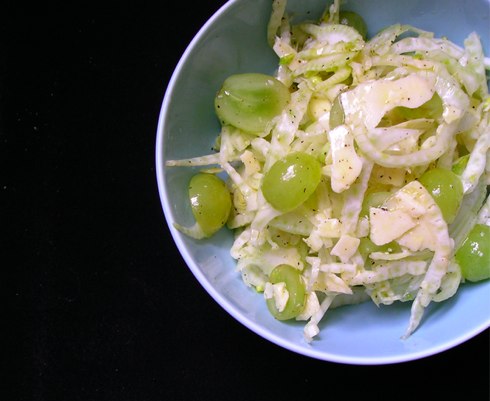 Just a few months ago I wrote about my simple fennel salad, a kitchen standby that tastes absolutely fresh and delicious, and requires only about five minutes of one’s time to make. The standard version requires fennel, good Parmesan, salt, pepper, a lemon vinaigrette and some fresh herbs- a winning combination.
While I make a point to get variety into my meals, both for myself, and for your viewing pleasure, some dishes (like this one) are so good that they get heavy rotation in the kitchen. I take a lot of pleasure in tweaking these favorites each time based on ingredients I have on hand, and seasonal variety. This version, for instance, includes grapes, aged gruyere, and meyer lemon.
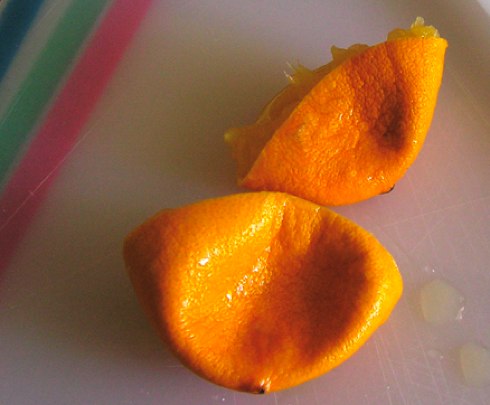
Today, my quest for lunch began with one beautiful meyer lemon, sitting on my counter, just waiting to be used. Meyer lemons are much sweeter than the regular yellow lemon, more of a cross between a lemon and a mandarin orange, imported to the United States a little over one hundred years ago from China. These little fruits are absolutely delicious.
As I searched through the fridge, I came across a fennel purchased at the farmers market that had been hiding, and a little bit of leftover aged Gruyere that I had bought from Cowgirl Creamery. With such delicious ingredients, I knew that I wouldn’t be letting my little lemon down.
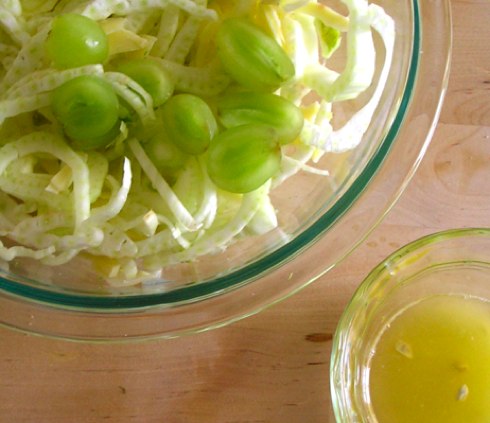
Today’s Simple Fennel Salad, revisited: Simply toss one fennel bulb, shaved or thinly chopped, with a handful of plump green grapes, and some aged gruyere. Top with a lemon vinaigrette: one meyer lemon, a few good glugs of extra virgin olive oil, some pepper, and coarse salt.
Other things you can do with fennel salad: I like the idea of pairing fennel with cheese, fruit, and a citrus-y vinaigrette, but even within that structure, there are endless possibilities. I might do it with apples, orange slices, or pears. I might add feta and olives and call it greek. A big handful of fresh herbs, such as parsley, thyme, or mint always complements the flavor. You can also add color by adding some grated carrots, mushrooms or arugula. You could also toss in a handful of fresh walnuts, or lace it with some prosciutto, or top with some white anchovies. Get where I’m going here? This salad allows for freedom and creativity which is why I love it so much!
As part of a menu: I think that this salad is great on its own, or with a little bit of good bread, but it would be equally nice paired with some grilled shrimp, chicken or fish, with a side of roasted potatoes.
by Sam Tackeff | Mar 12, 2009 | Barefoot Blogging, Poultry, Quick and Easy
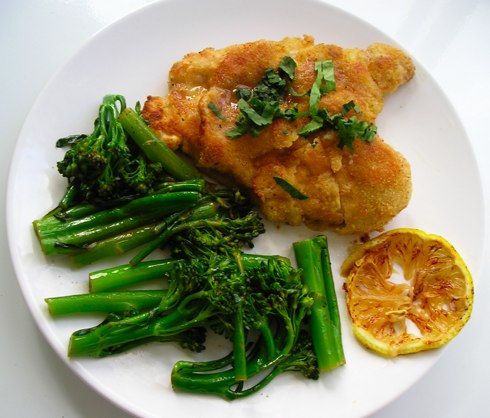
This Thursday’s barefoot blogging challenge was chosen by Lindsey of Noodle Nights and Muffin Mornings, and had us all in the kitchen cooking Ina Garten’s Chicken Piccata. Now, to be fair, because there are no capers in this dish, I’m not sure how she gets away calling it a piccata, but nevertheless it’s certainly tasty.
I chose to accompany the dish with some Sautéed Broccolini (for BB extra credit, chosen by Mary, of Meet Me in the Kitchen). I suppose you could pair this chicken with almost any vegetable (green beans, regular broccoli, and swiss chard come to mind), and just sauté them the same way in your pan- it tastes infinitely better if you do it in the pan right after you make your delicious piccata sauce, so it absorbs all of that wonderful lemony flavor.
Other things you could do with this chicken: I think that this would taste equally tasty on a nice bit of ciabatta bread with some arugula as a sandwich, or served over some pasta with freshly grated Parmesan. My mother also makes a similar dish served with a side of sauteed cabbage and onions, over farfalle pasta, that my brother swears by.
Breading Chicken: To bread your chicken, it’s easiest if you have a little lineup set up. You can do it in plates, but I think that bowls make it all a lot cleaner.
 Some things about online recipes to keep in mind: Sometimes, the recipe gets translated badly onto the food network, or other recipe posting sites online. Most of Ina’s recipes are for four in her cookbook, and yet somehow the food network versions are for two, with some errors (like enough sauce and breading ingredients for four, but only calling for two pieces of chicken). I find that I tweak many of the recipes posted here online, although the recipes in her book are usually winners.
Crispy Lemony Chicken
serves 4
adapted from Ina Garten
4 boneless, skinless chicken breasts, pounded to 1/4 inch thick
salt and pepper
1/2 cup flour
1 extra-large egg
3/4 cup seasoned dry breadcrumbs (I used plain that I seasoned with my own spices)
Extra Virgin Olive Oil
3 tablespoons unsalted butter at room temperature
juice of 2 lemons
1/2 cup dry white wine
Chopped parsley leaves, for serving
Method
1. Preheat the oven to 400 degrees fahrenheit. Line a sheet pan with parchment paper.
2. To pound your chicken, place the breast between two sheets of parchment paper or saran wrap, and pound flat with a heavy object. *Thin chicken breasts are really important so that the chicken cooks quickly and evenly.* Season with salt and pepper, and set aside.
3. Create your breading line: I like using three bowls (see above). In the first bowl, put the flour, with 1/2 teaspoon of salt, and 1/2 teaspoon of pepper. In the middle bowl, crack in one extra large egg, and a 1/2 tablespoon of water. In the third bowl, place your breadcrumbs. Now comes the fun part! Dip each chicken breast- first in the flour, to coat lightly, then in the egg mixture, and finally in the breadcrumbs. (You will have enough leftover in the bowls if you want to make extra chicken.)
4. In a large sauté pan, heat 1 tablespoon of olive oil over medium-low heat. Add the chicken breasts, and cook for 2 minutes on each side, until the crust is nicely browned. Place them on the sheet pan, and then bake in the oven for about 5 minutes while you make the sauce.
5. In the same saute pan that you have cooked the chicken, add a tablespoon of melted butter, then add the lemon juice, the wine, some salt and pepper. Boil for a few minutes over high heat, until it reduces by half, and then take off the stove and swirl in the extra two tablespoons of butter. Set aside in a bowl, and use the pan to make whatever vegetable you are serving it with.
6. Plate the chicken, pour on some sauce, add the fresh parsley, and serve with a wedge of lemon. It’s a surprisingly light and refreshing dish!
Sauteed Broccolini
serves 2
Ingredients
1 small bunch broccolini
1 tablespoon unsalted butter
1 small clove of garlic, minced
Juice of half a lemon
1/4 teaspoon of ground black pepper
Juice of half a lemon
Method
Steam the broccolini with a few tablespoons of water in the microwave for three minutes, and drain. In the pan that was used for the lemon sauce, add a the butter, garlic and lemon juice, salt and pepper, and heat as the broccolini steams. Add the drained broccolini to the pan and sauté for a minute or two, turn off the heat, and plate.


 Another wonderful bonus of home made pasta is that the pasta dough is another good place in which to hide vegetables in for the picky eater. For this pasta, I used two eggs, 3.5 cups of flour, and I added spinach, about 6 ounces of defrosted frozen spinach, which I had emulsified with my hand held emulsifier. This makes the paste smooth, and easily workable into the dough. If I were to do this dish again, I’d probably add some basil as well, but you could easily puree any vegetable and add it to a basic dough.
 Ultimately, this lasagna was delicious. Painfully delicious. As in my forearms. All of the rolling. I spent three days eating it, hot, cold, microwaved, for breakfast, until I could lasagna no more. Was it better than my Stouffers? Er… Yes. Would I make it again? Yes. Although, probably sooner if I had a Martha Stewart Blue Kitchen Aid Mixer. (Hint, hint…. nudge, nudge…) Until then, I’ll savor this experience.
 This weeks
  We drove up the 101 to Petaluma, and then across towards Tomales, a tiny town on the 1, where we stopped at
  Point Reyes, in addition to being in the middle of beautiful farm land, right on Tomales Bay, is home to
  Today I made these tarts for lunch, and couldn’t have been a happier camper. So delicious!
 I also had some fish Ceviche, which was marinated really nicely in lime, and had a decent kick. It was also served on a fish shaped plate, so bonus points, in my opinion.
 Just a few months ago I wrote about my simple fennel salad, a kitchen standby that tastes absolutely fresh and delicious, and requires only about five minutes of one’s time to make. The standard version requires fennel, good Parmesan, salt, pepper, a lemon vinaigrette and some fresh herbs- a winning combination.


 Some things about online recipes to keep in mind: Sometimes, the recipe gets translated badly onto the food network, or other recipe posting sites online. Most of Ina’s recipes are for four in her cookbook, and yet somehow the food network versions are for two, with some errors (like enough sauce and breading ingredients for four, but only calling for two pieces of chicken). I find that I tweak many of the recipes posted here online, although the recipes in her book are usually winners.