by Sam Tackeff | May 15, 2010 | Books, Cheese, omnivore books
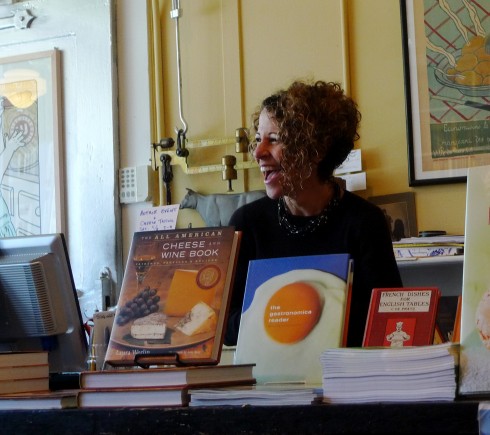
[This photo of Laura Werlin (cheese lover and author) is a perfect example of how much fun we have at Omnivore Books.]
Laura came by to talk about cheese, but more importantly, to lead us in a mini-tasting. We had a tasting of three American cheeses, all of which I’d purchase again, and recommend highly. Forgive my cheese-tasting notes, I need to work on cheese vocabulary without sounding inept or worse, ridiculous – “grapefruit and foie gras notes in that cheese Marty, don’t you think?…”
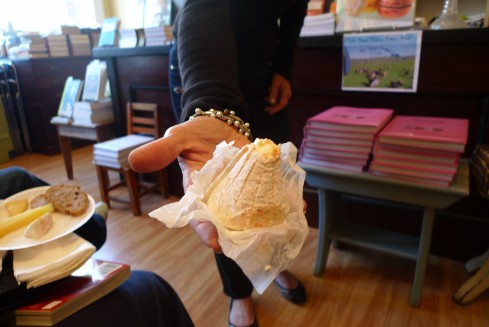
1. Crocodile Tears (See photo below) – made by Judy Schad of Capriole Dairy in Indiana. This was an aged but still soft goat cheese with a really smooth goat-cheesy texture, and nice tangy flavor. While sampling this cheese we learned that most goat cheeses are that characteristic whitish color because don’t metabolize beta carotene the same way that cows do, producing a lighter milk.
2. Pleasant Ridge Reserve – made by Uplands Cheese Company in Dodgeville, Wisconsin. A special cross breed of cows, and rotational grazing techniques used by the farmers makes this cheese a nice golden color. It was a firm (semi-hard?) cheese with such pleasant complex notes – a little bit like tasting the grass the cows were eating in the plains, just a little bit of nuttiness and a tiny crunch.
3. Oma – made in Vermont by the Von Trapp Farmstead, aged in the Cellars of Jasper Hill, one of the only Affineurs (cheese agers) in our country. Yes, those Von Trapps. We tasted this cheese last, as it was the most “aromatic” aka delightfully smelly. It was also wonderfully creamy.
But maybe it’s something about people who work with cheese:
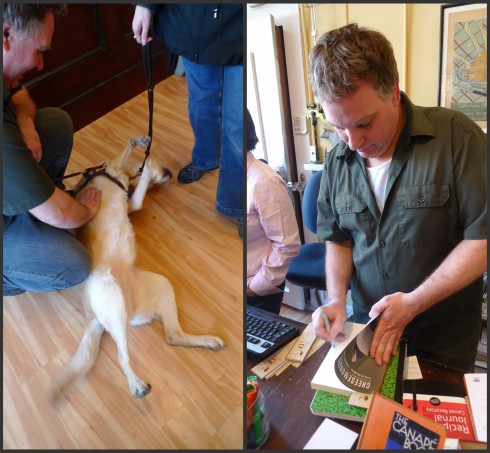
Here’s Gordon Edgar – Cheesemonger at Rainbow Grocery, and author of one of the best food books I’ve read this year. His book, ‘Cheesemonger: A life on the Wedge‘ single-handedly doomed me to uncontrollable cheese cravings for the past month. (Fortunately, my family just gave me a gift certificate to Rainbow Grocery for my birthday, so I now have the funds to spend it all on cheese. I’ll have to use restraint.)
I loved this book because the voice is uniquely Gordon Edgars’ – and is as passionate about cheese as he is about politics, activism, music, and the Bay Area. I learned more about my city from reading this book than from living here. (Which just tells me that I have to be more involved. Folsom St. Fair anyone?) In fact, I enjoyed it so much, that when I finished reading it…. I went back to his livejournal, which to my delight has archives dating back to 2002. I know, I’m a little creepy.

And he loves dogs! And dogs love him.. Maybe dogs also love cheese?
But then, he too fed us delicious cheese:
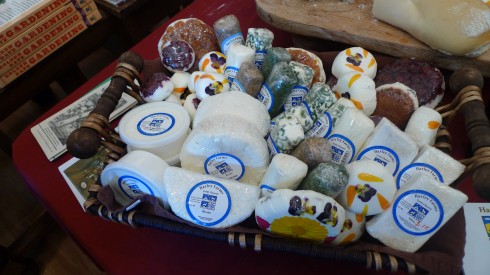
Dee Harley’s freshly made goat cheese from her farm in Pescadero. Not only was this goat cheese delicious and fresh, but I had the privilege to take home some of the leftovers. It went on asparagus, morning toast, and in a glorious trick – in the cavity of my roasting chicken. Delicious!!
Jealous?
Come to Omnivore! Here’s the event calendar. There are events every week – usually on the weekends, but some excellent ones scheduled during the week as well.
As for more cheese lust- this is what I’ve been reading over the past few weeks:
It’s Not You, It’s Brie : Kirstin loves cheese, and works as a ‘cheese program director’ among other fabulous food related jobs. She also takes some beautiful photographs of cheese, and makes me hungry on a regular basis.
@formaggio on twitter: I follow Formaggio Kitchen because I’m a masochist. Some of the best cheese (and foodstuffs) on the East Coast. A few years back I went to a cheese tasting with Ihsan Gurdal (the owner) at Tanglewood. Do it if you have a chance.
Gordon Edgar’s Blog: Yes, the Cheesemonger keeps us updated and laughing.
I also am in the middle of reading ‘The Town That Food Saved: How One Community Found Vitality in Local Food‘ about a community in Vermont at the center of a food revolution/scandal/hype/or what have you. (You’ll have to read it.). It also has a good amount of information on cheese and dairy’ing. Worth a look.
by Sam Tackeff | Jan 28, 2010 | Cheese, Restaurants, Vegetables
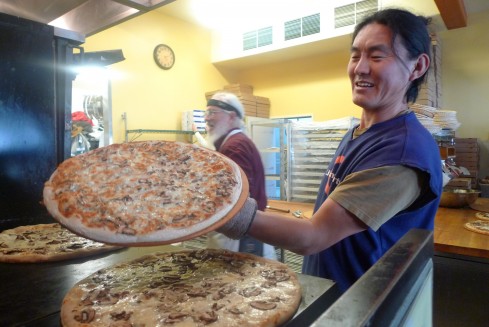
I’ve only eaten about twenty pizzas at Cheeseboard this year. Yes, that’s right, I said twenty pizzas. And it’s a modest estimate. Now, if you’ve seen me recently, you will notice that I’m more than twenty pizzas thinner (a loose pizza to pound estimate) than last year, so it’s safe to say that this pizza has fit in perfectly fine with my healthy diet.
I’m a sucker for neighborhood food, and the pizza from Cheeseboard certainly qualifies. Cheeseboard is a co-op that has been going strong for decades. Most of my friends who grew up in Berkeley in the 80’s and 90’s have a parent or two who has been a part the collective. There is no boss, manager, or employees – it is worker owned. What does this mean practically?
Delicious pizza, of the freshest ingredients, served up by happy people who are integrally connected to the food. There is real stake in this product, and it shows.
Yes, I travel for my pizza. I love heading over the bridge to Berkeley – less than an hour from SF on public transit, including the short walk from BART. It’s peaceful, friendly, and let’s me get my hippy on.
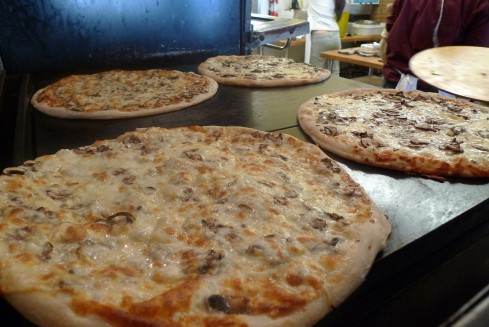
The pizza at Cheeseboard is made fresh, from some of the highest quality ingredients. They are thin and crispy, and topped with the finest cheeses, including gruyere, goat cheese, feta, montalban, fresh mozzerella, to name a few. They are also topped with seasonal and local vegetables – and they are vegetarian, although even a devout carnivore would hardly notice the absence of meat.
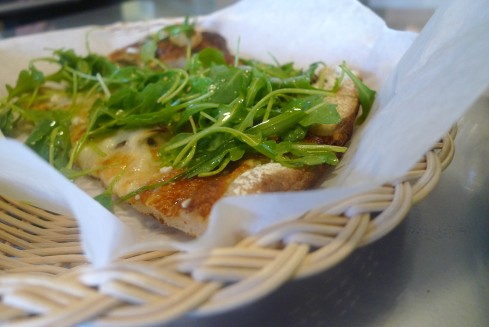
This particular pizza was cremini mushroom, onion, mozzarella, and ricotta salata, topped with an arugula salad dressed in a lemony vinaigrette. Salad on a pizza? Light, refreshing, and balanced. Trust me, it’s wonderful.
Things to know about Cheeseboard:
There will be a line. It goes incredibly quickly, and it is worth it.
1. One pizza a day. No choices, you get what they have. (Part of the reason the line goes so quickly.)You can see what the pizza of the day is on their website, or by following (the unofficial, but totally reliable pizza of the day) on twitter. Or head in to be surprised. They have a few pizzas in heavier rotation, and particular favorites include:
** Roasted potatoes, onions, chile passilla, mozzarella and feta cheese, garlic olive oil, cilantro, key lime.
** Roasted cauliflower, caramelized onions, mozzarella and Montalban cheese, pistachios, garlic olive oil, fresh herbs
** Fresh corn and chile pasilla, onions, feta and mozzarella cheeses, garlic olive oil, cilantro and Mexican key lime.
There is also a salad of the day, and usually a fresh cookie, the best being the gingerbread cookie. They also offer a variety of tasty adult beverages, as well as kid friendly beverages, all of which of the all-natural and delicious variety.
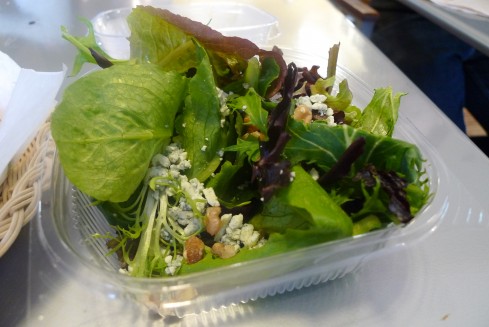
This particular salad was mixed baby greens with blue cheese and walnuts, with a balsamic vinaigrette. One of my favorites. (I also have a particular fondness for coleslaw day.)
2. Cash only. The pizza is inexpensive – 20 dollars for a whole pizza, including tax and tip. You can also purchase by the slice ($2.50), or by half pizza, 3/4 pizza, etc. My advice for the best date? Take a 20 dollar bill, and you can get a half pizza ($10), a small salad ($3.50), a cookie ($2.00), maybe a drink, and a couple of dollars to tip the musicians.
Prepare in advance, or if need be, head down to the ATM – one a block away is Bank of America, but there is a Wells Fargo ATM a few blocks away in Andronico’s.

3. Live Music! The music is great, mostly jazz, and makes for a festive mood. Don’t forget to tip the musicians! They appreciate it! Yesterday was a smashing performance by The California Honeydrops – I polished off an extra slice of pizza just to hear some more of their music. (There were three more musicians jamming out of the photo…)
4. Don’t forget to head next door! Pick up some cheese to go! Next door at the Cheeseboard, you can immerse yourself in cheese heaven – and be sure to check out the discount cheese basket hanging from the counter (maybe I shouldn’t have shared that secret), and their selection of tasty breads and pastries. You can also purchase pizza from next door here to go, if the line at the pizza place looks impossible.
Berkeley Cheeseboard Pizza
(The Cheeseboard Collective)
Web: http://cheeseboardcollective.coop/
1512 Shattuck Ave. Berkeley.
Phone: 510-549-3055
Unofficial Twitter: http://twitter.com/cheeseboard
How to get there: A short walk from Downtown Berkeley Bart down Shattuck- (about 12 minutes) Just have someone point you towards the “Gourmet Ghetto”.
by Sam Tackeff | May 27, 2009 | Baking, Cheese, Daring Bakers, Turkish
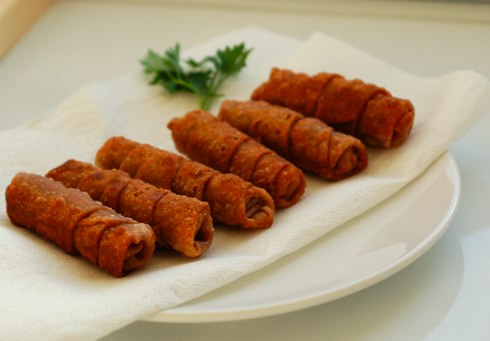
The technical details: The May Daring Bakers’ challenge was hosted by Linda of make life sweeter! and Courtney of Coco Cooks. They chose Apple Strudel from the recipe book Kaffeehaus: Exquisite Desserts from the Classic Cafés of Vienna, Budapest and Prague by Rick Rodgers. And many thanks of course to Lisa of La Mia Cucina and Ivonne of Cream Puffs in Venice.
The assignment: Strudel dough, filling of our choice. I knew I didn’t want apple filling, because, well, it just feels wrong to be eating apples in May, even though I now live in California, and I suppose I could get a nice, ripe, seasonally grown local apple if I looked hard enough.
So what did I choose? The Sigara Borek – a Turkish favorite of my childhood.
These things are crispy, fried, filled with white cheese and parsley, perfect for breakfast, an afternoon tea with guests, or to snack on while watching sports.
Mine are a bit of a bastardized version that ended up looking like dark fried wontons – because I had to use whole wheat bread flour instead of white, and then didn’t roll the stuff out as thin as I should have. The phyllo, or Yufka (Turkish phyllo) versions look a lot more golden. If you are going to make home made dough, it has to be done well in advance – the dough takes at least 90 minutes to sit.
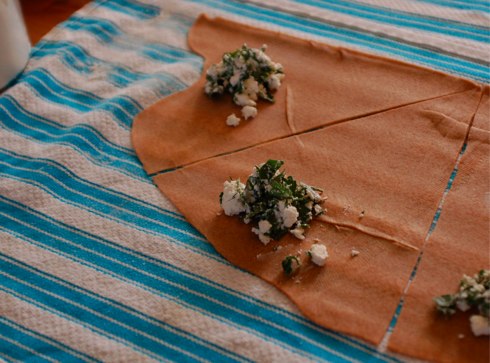
The best part is that they can be made in advance, and then frozen – so you can pop them out and fry them in a little oil whenever you need them fresh.
But what if I’m looking after my health? Well, I also, in the spirit of Daring Bakers, tried a baked version, and another version which involves baking in water. Were they good you ask? As you can tell, neither of them are posted. So, that’s the beauty of freezing these guys, you can make three at a time, and not feel terrible about eating them all.
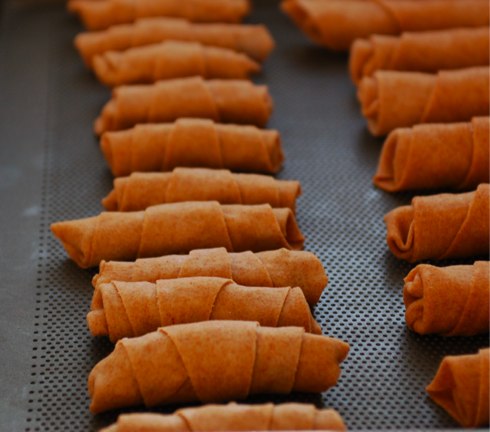
Sigara Borek
(makes a whole bunch, easily freezable)
Ingredients:
– a package of phyllo dough (or the Streudel Dough recipe below if you are up for a challenge)
– about 3/4 lb of white cheese (I use Bulgarian feta, or Valbreso the closest equivalents here in the states)
– a cup or more of freshly chopped parsley
– a little bit of water, for sealing the rolls
– vegetable oil, for panfrying
Method:
This works best as an assembly line:
1. Prepare the dough, by laying a flat sheet and cutting it into triangles (or if, you are rolling your own dough, roll it into a round shape, and cut out triangles like pizza slices).
2. Prepare filling: super easy! just mix the cheese and your really big handful of parsley together.
3. Spoon filling (about a heaping tablespoon) onto the wide end of the triangle (see my picture above), and then fold in the two sides, and roll up the end, using a little bit of water as glue to stick the end together. It’s easiest if you spoon the filling on a bunch of triangles and then roll them up one after another.
4. About here you can freeze the ones you aren’t going to be eating right away – freeze individually on a baking pan to keep them from sticking, and then once frozen, you can put them in a big ziplock together.
To eat: just fry for a few minutes in some vegetable oil, about a 1/4 inch deep on medium high heat, turning until all sides are golden brown (about 2-4 minutes). Note, if you use phyllo dough, they won’t have quite the bubble wonton look that mine do.
Home made dough:
from “Kaffeehaus – Exquisite Desserts from the Classic Cafés of Vienna, Budapest and Prague” by Rick Rodgers
1 1/3 cups (200 g) unbleached flour
1/8 teaspoon salt
7 tablespoons (105 ml) water, plus more if needed
2 tablespoons (30 ml) vegetable oil, plus additional for coating the dough
1/2 teaspoon cider vinegar
1. Combine the flour and salt in a stand-mixer fitted with the paddle attachment. Mix the water, oil and vinegar in a measuring cup. Add the water/oil mixture to the flour with the mixer on low speed. You will get a soft dough. Make sure it is not too dry, add a little more water if necessary. Take the dough out of the mixer. Change to the dough hook. Put the dough ball back in the mixer. Let the dough knead on medium until you get a soft dough ball with a somewhat rough surface.
2. Take the dough out of the mixer and continue kneading by hand on an unfloured work surface. Knead for about 2 minutes. Pick up the dough and throw it down hard onto your working surface occasionally. Shape the dough into a ball and transfer it to a plate. Oil the top of the dough ball lightly. Cover the ball tightly with plastic wrap. Allow to stand for 30-90 minutes (longer is better).
3. It would be best if you have a work area that you can walk around on all sides like a 36 inch (90 cm) round table or a work surface of 23 x 38 inches (60 x 100 cm). Cover your working area with table cloth, dust it with flour and rub it into the fabric. Put your dough ball in the middle and roll it out as much as you can. Pick the dough up by holding it by an edge. This way the weight of the dough and gravity can help stretching it as it hangs. Using the back of your hands to gently stretch and pull the dough. You can use your forearms to support it.
4. The dough will become too large to hold. Put it on your work surface. Leave the thicker edge of the dough to hang over the edge of the table. Place your hands underneath the dough and stretch and pull the dough thinner using the backs of your hands. Stretch and pull the dough until it’s about 2 feet (60 cm) wide and 3 feet (90 cm) long, it will be tissue-thin by this time. Cut away the thick dough around the edges with scissors. The dough is now ready to be filled.
by Sam Tackeff | Mar 26, 2009 | Barefoot Blogging, Cheese, Food Travel
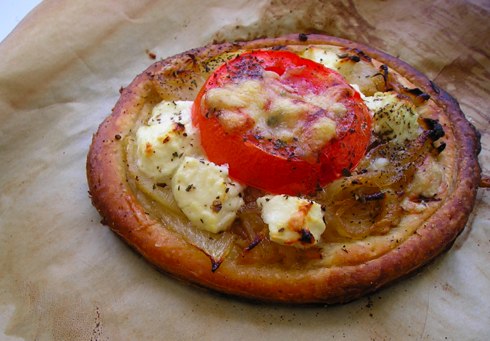 This weeks Barefoot Blogging challenge, chosen by the lovely Anne of Anne Strawberry is one of my favorite recipes of Ina’s, her absolutely delicious Tomato Goat Cheese Tarts. These tasty tarts have two types of cheese: goat, and another melty cheese (Ina uses parmesan, but I used fontina this time to fulfill Adventures in Gluttony’s Cheese of the Month Challenge) and so really, how can you go wrong? It’s also a fairly great base recipe for getting in your vegetables, as you could easily top on a variety of seasonal vegetables and it would work out fantastically.
In order to serve them justice, (and admittedly to get out of the city for some quiet), I decided to go on a quest for cheese outside of San Francisco. We hopped in the car in the early afternoon, and drove across the golden gate bridge, heading up the coast for the country. Cheese, an ocean view, sunshine, farm land, and cows are among my criteria for excellent adventuring, and all were successfully met on this trip.
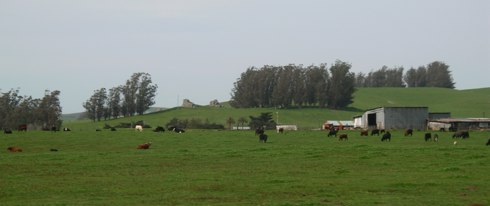 We drove up the 101 to Petaluma, and then across towards Tomales, a tiny town on the 1, where we stopped at Mostly Natives Nursery so I could buy some herbs for my kitchen including a rosemary bush, some cilantro, parsley, marjoram, oregano, two types of thyme, and mint. I’m used to having a garden with fresh herbs, and now living on the third floor with no land, I’ve been missing out. I’m hoping these guys will pull through living in the house by the windows! We wanted to go to Tomales Bakery, but it is only open Thursdays through Sunday, so we continued back down the incredibly beautiful coastline, driving past Tony’s, and Hog Island Oyster Company (two food destinations which I will get to some point soon!), and towards Point Reyes.
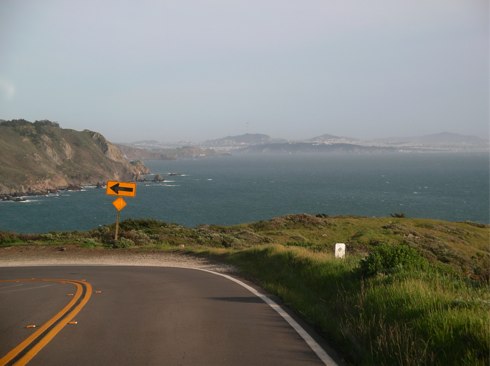 Point Reyes, in addition to being in the middle of beautiful farm land, right on Tomales Bay, is home to Cowgirl Creamery, the main destination of my cheese quest. After sampling, sampling and more sampling, I settled on three cheeses. Fontina, to satisfy my Cheese of the Month, some more of an aged gruyere that I purchased a few weeks ago in Cowgirl’s Ferry Building store, and some really remarkable goat cheese, called Hoja Santa. Hoja Santa is made in Dallas by Paula Lambert of the Mozzarella Company, and is wrapped in the leaves of the Hoja Santa plant, which is supposed to impart the taste of sassafras to the cheese. After sampling it, I knew it was the one for Ina’s tarts.
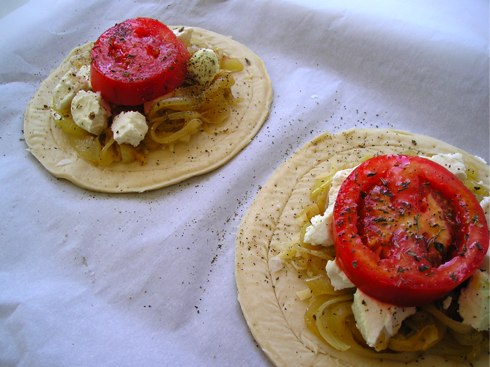 Today I made these tarts for lunch, and couldn’t have been a happier camper. So delicious!
Tomato and Goat Cheese Tarts
adapted from Ina Garten
Serves 2
Ingredients:
– 1 sheet of puff pastry, defrosted
– extra virgin olive oil
– 1/2 large onion, thinly sliced
– 1 clove garlic
– coarse salt and black pepper
– 2 tablespoons dry white wine
– 2 teaspoons minced fresh thyme leaves
– 4 tablespoons freshly grated Fontina, with some shaved
– 2 ounces goat cheese (I used plain, but Ina recommends herb and garlic Montrachet)
– 2 thick slices of tomato (about 1/4 inch) from a medium tomato
– a few teaspoons of julienned basil (use fresh if at all possible, but it works fine with dried)
Method:
1. Preheat the oven to 425 degrees.
2. Take a sheet of defrosted puff pastry (I used Trader Joe’s Artisanal Puff Pastry, frozen, which comes in big sheets), and draw six inch large circles of pastry, using a bowl or saucer as your guide. Place pastry rounds on a sheet pan lined with parchment, and stick in the fridge to keep them cold until you are ready to use them. (Note: quickly take the leftover scraps, sprinkle them with cinnamon and sugar, and put them in the oven for the next ten minutes or so while you cook the onions. They make a fantastic snack.)
3. In a pan on medium heat, add a couple of good glugs of olive oil, and saute the onion and garlic for about 15 minutes until starting to get very soft. Season with salt and pepper, add the white wine and thyme leaves. Turn the heat down just slightly, and cook for another 10 to 15 minutes until very soft and lightly browned. Take off the heat.
4. Now for the fun part: take your pastry rounds, and with a sharp knife, score a 1/4 inch wide border around the inside of the edge of the circle. Sprinkle about a tablespoon of the fontina cheese on each round, staying inside the scored border. (This is so when baking, the border will rise and create a little edge.)
5. In each circle, place half of your sauteed onions inside the border, and crumble an ounce of the goat cheese. Take your tomato and plop it on top, brushing it with a little bit of olive oil, giving it a sprinkle of salt, pepper, and the basil, and the rest of the fontina cheese.
6. Bake for 20 minutes, until the pastry is golden. You might want to watch it in the end, because if your oven is too hot or uneven it might start to burn. You can serve it on its own, or with a little lemony salad with arugula, and any leftover tomato you might have.
by Sam Tackeff | Feb 17, 2009 | Challenge, Cheese, Quick and Easy, Seafood
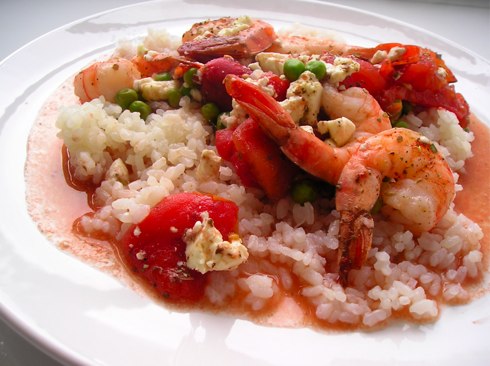
In an effort to diversify my kitchen productions, I’ve been looking for new food blogger challenges to have fun with. One of my favorite challenges I have found so far is the “Cheese of the Month” challenge from Adventures in Gluttony, which provides a monthly cheese suggestion to create something delicious with.
This month’s featured cheese is feta, which coincidentally happens to be one of my favorite cheeses. I use feta and it’s cousin white cheese (Turkish ‘beyaz peynir’) almost interchangably, the latter being slightly less salty. I usually have a block of feta stored in some fresh water in my fridge, and eat it often plain, for breakfast, with a little slice of tomato and cucumber and a slice of toast with jam. Or, I crumble it on salads, into soups, or even on burgers.
For the challenge I decided to incorporate it into my lunch, baked with shrimp. This is a very loose adaptation of a broiled recipe my mother uses that I love and really should get a hold of, but nevertheless it was quick, easy and very very tasty. The feta I used was Mt. Vikos, which I picked up at Cowgirl Creamery in the Ferry Building in downtown San Francisco. I only used an ounce of feta (all I had left), but the flavor still comes out wonderfully!
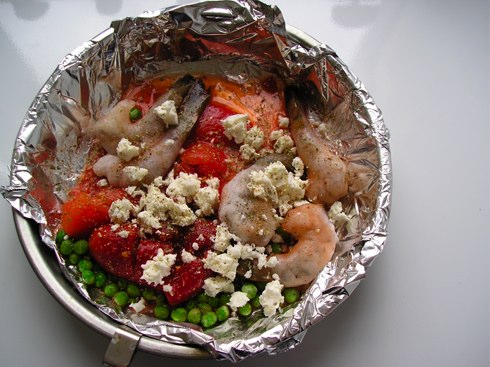
A Quick lunch: Baked Shrimp with Feta
serves 1
Ingredients:
4 or 5 shrimp (I used frozen)
A few small canned San Marzano tomatoes, with juice
1/4 cup frozen peas
1 ounce feta
a pinch salt,
a pinch pepper
a couple of good pinches oregano
Method:
1. Couldn’t be simpler: In a baking dish lined with foil, put all the ingredients, stirring gently to allow the tomato juice to coat everything. Whack it in the oven at 350 degrees for about 25 minutes, until shrimp are pink and cooked.
To serve: I served this over a bed of steamed rice, usually I use brown, but I’ve run out and need to pick up some more. I use frozen single servings of rice that I cook and wrap while still warm, which traps the moisture and allows you to easily pop one into the microwave and eat for lunch as if it was freshly made.


 This weeks
  We drove up the 101 to Petaluma, and then across towards Tomales, a tiny town on the 1, where we stopped at
  Point Reyes, in addition to being in the middle of beautiful farm land, right on Tomales Bay, is home to
  Today I made these tarts for lunch, and couldn’t have been a happier camper. So delicious!

